ACTIVE PROJECT
Teams Status Light
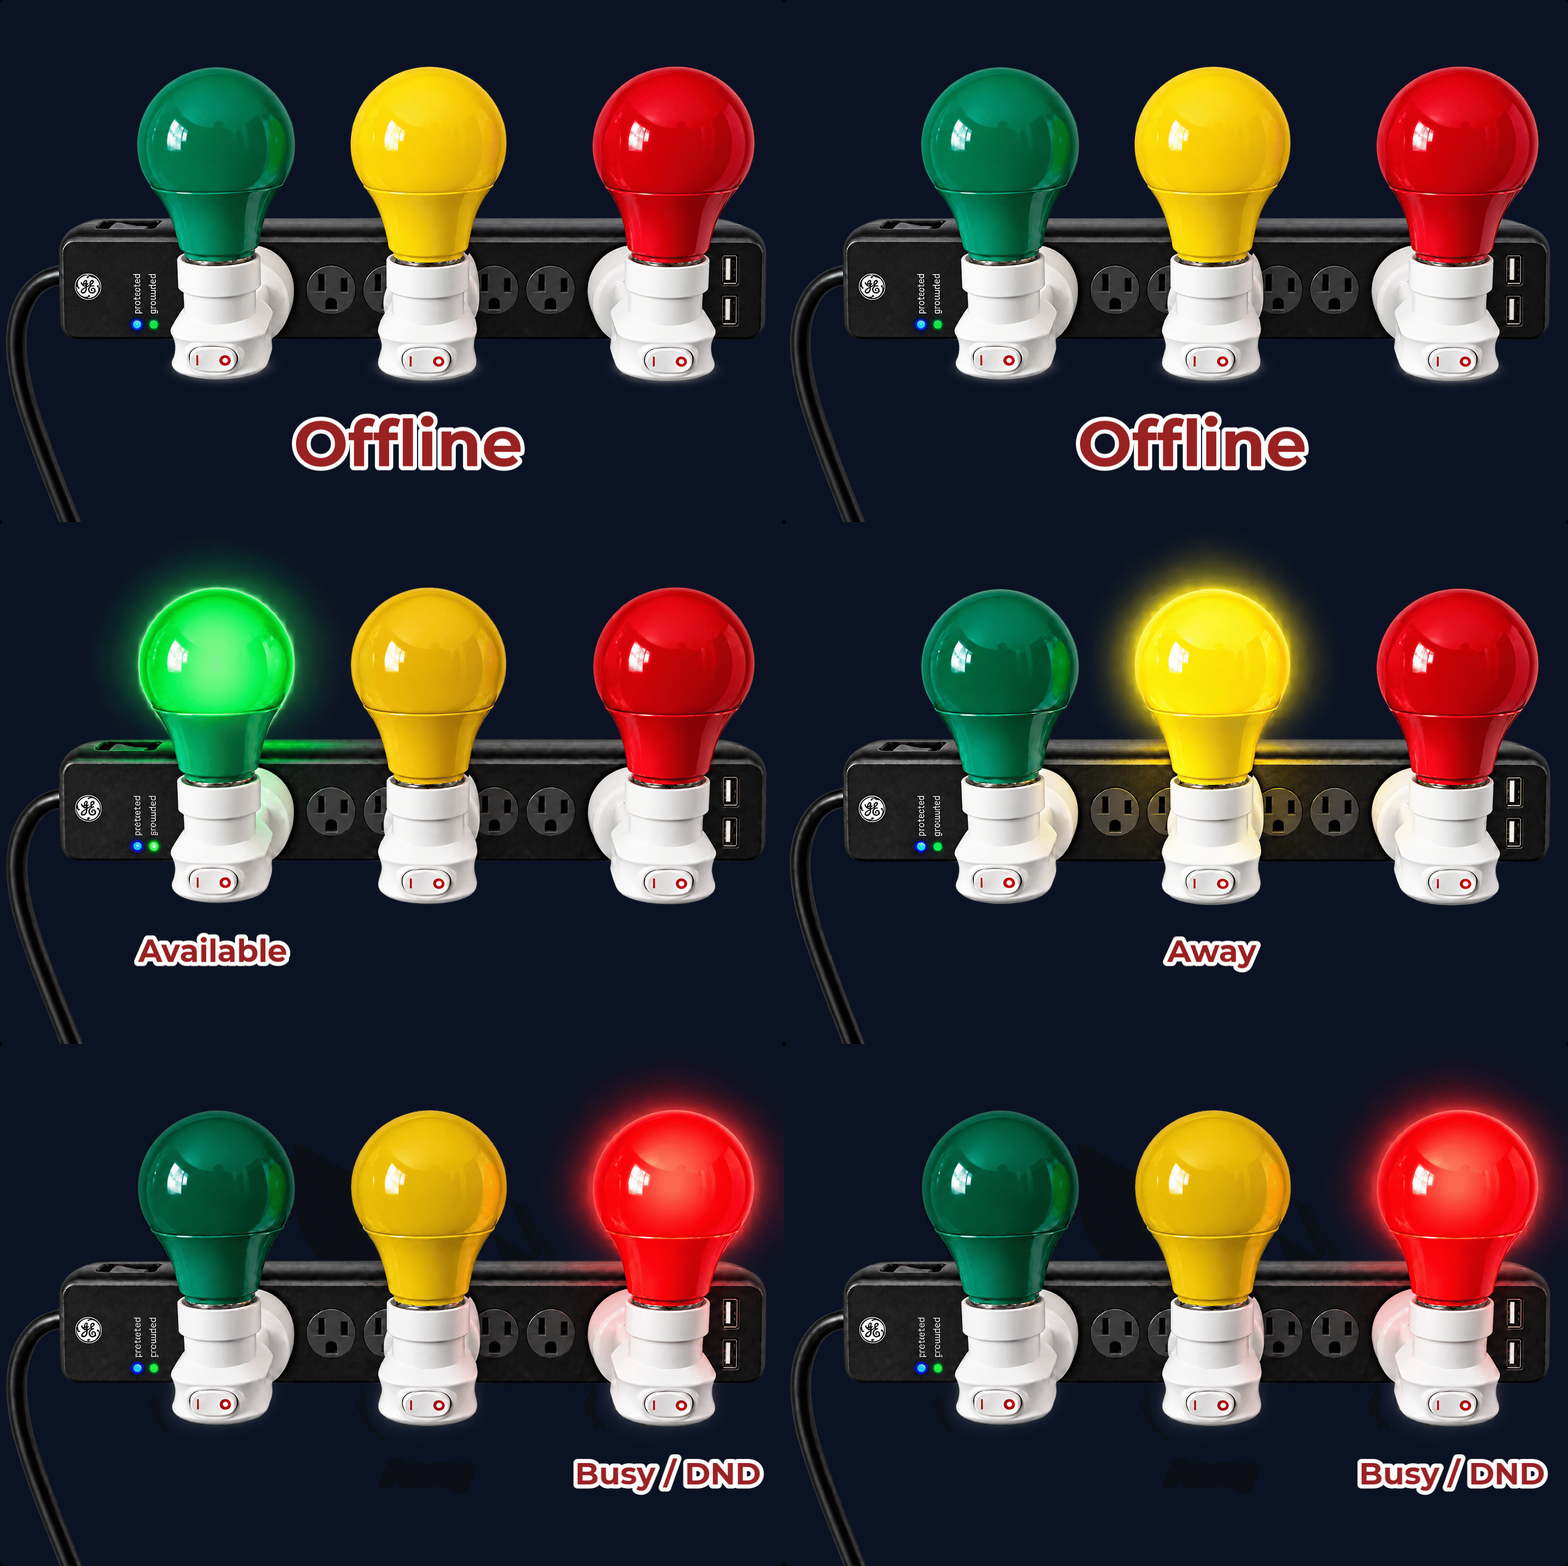
A physical desk light system that changes color based on Microsoft Teams presence using a simple three-bulb setup.
A home for personal software, websites, utilities, archives, and other things built by Douglas.
Each personal build opens in a full-screen project view with its own documentation, images, setup details, and downloads while keeping the same Built by Douglas visual system.
ACTIVE PROJECT
A physical desk light system that changes color based on Microsoft Teams presence using a simple three-bulb setup.
LEGACY BUILD
A Raspberry Pi Mini NES that uses physical NFC cartridges to identify a game and launch its matching RetroPie ROM automatically.
LIVE DESKTOP PET
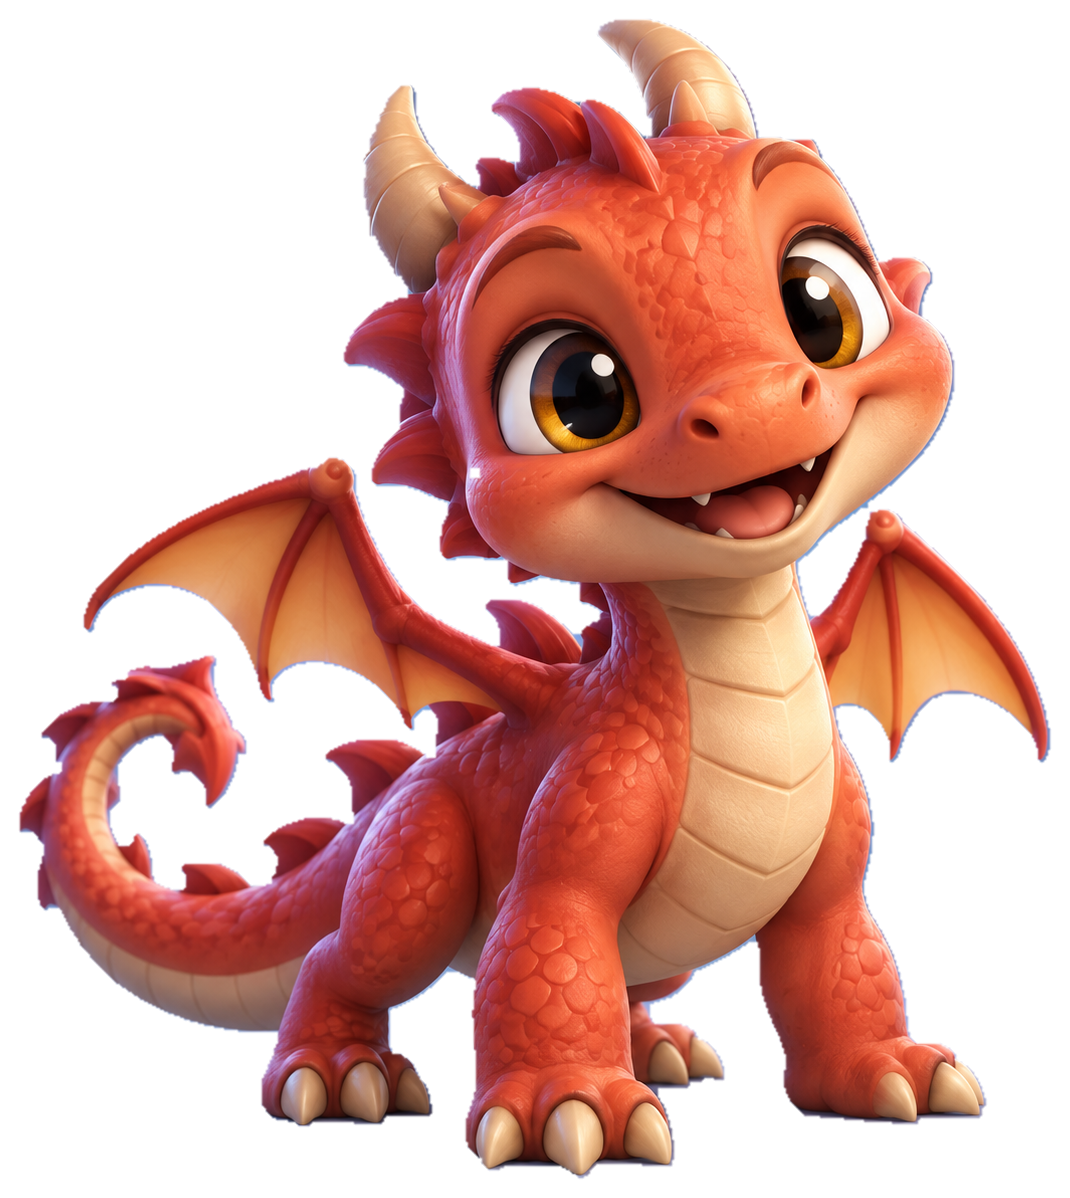
Meet Ember — a tiny desktop dragon that walks your screen, tells jokes, breathes fire, plays games, chases toys, builds a bond, and gets into harmless mischief.
CLIENT WEBSITE
A complete redesign and rebuild for a custom welding and fabrication business, turning a basic template site into a polished industrial brand focused on repairs, fabrication, and real client work.
A simple status-light project that turns Microsoft Teams presence into an easy-to-read physical signal on your desk.
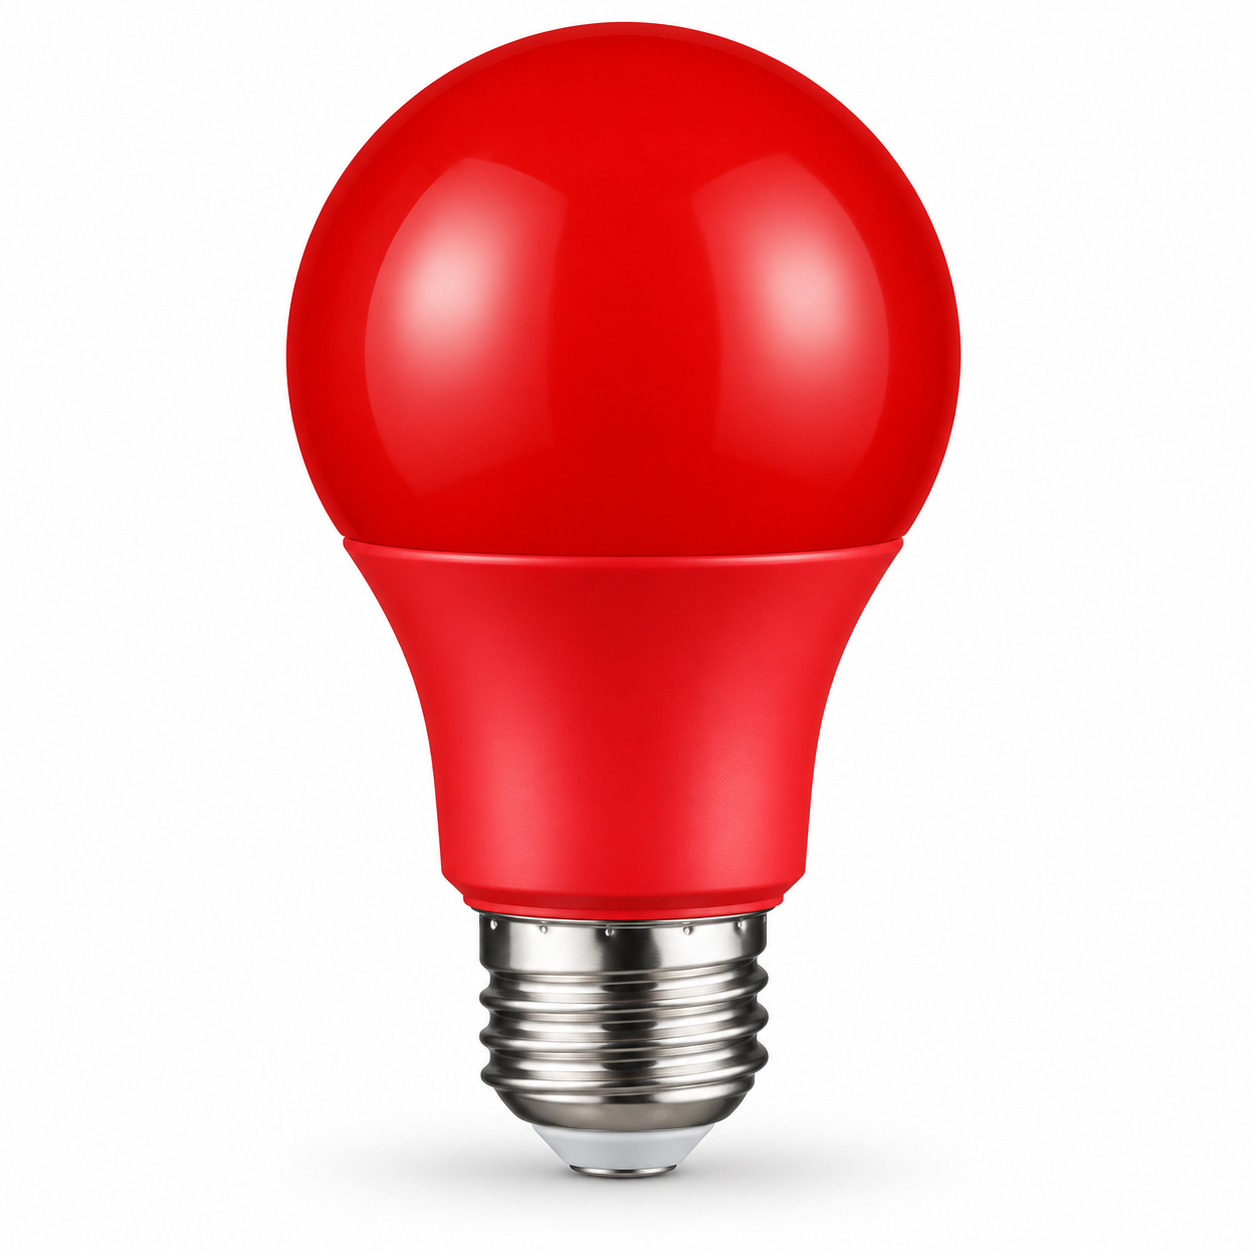
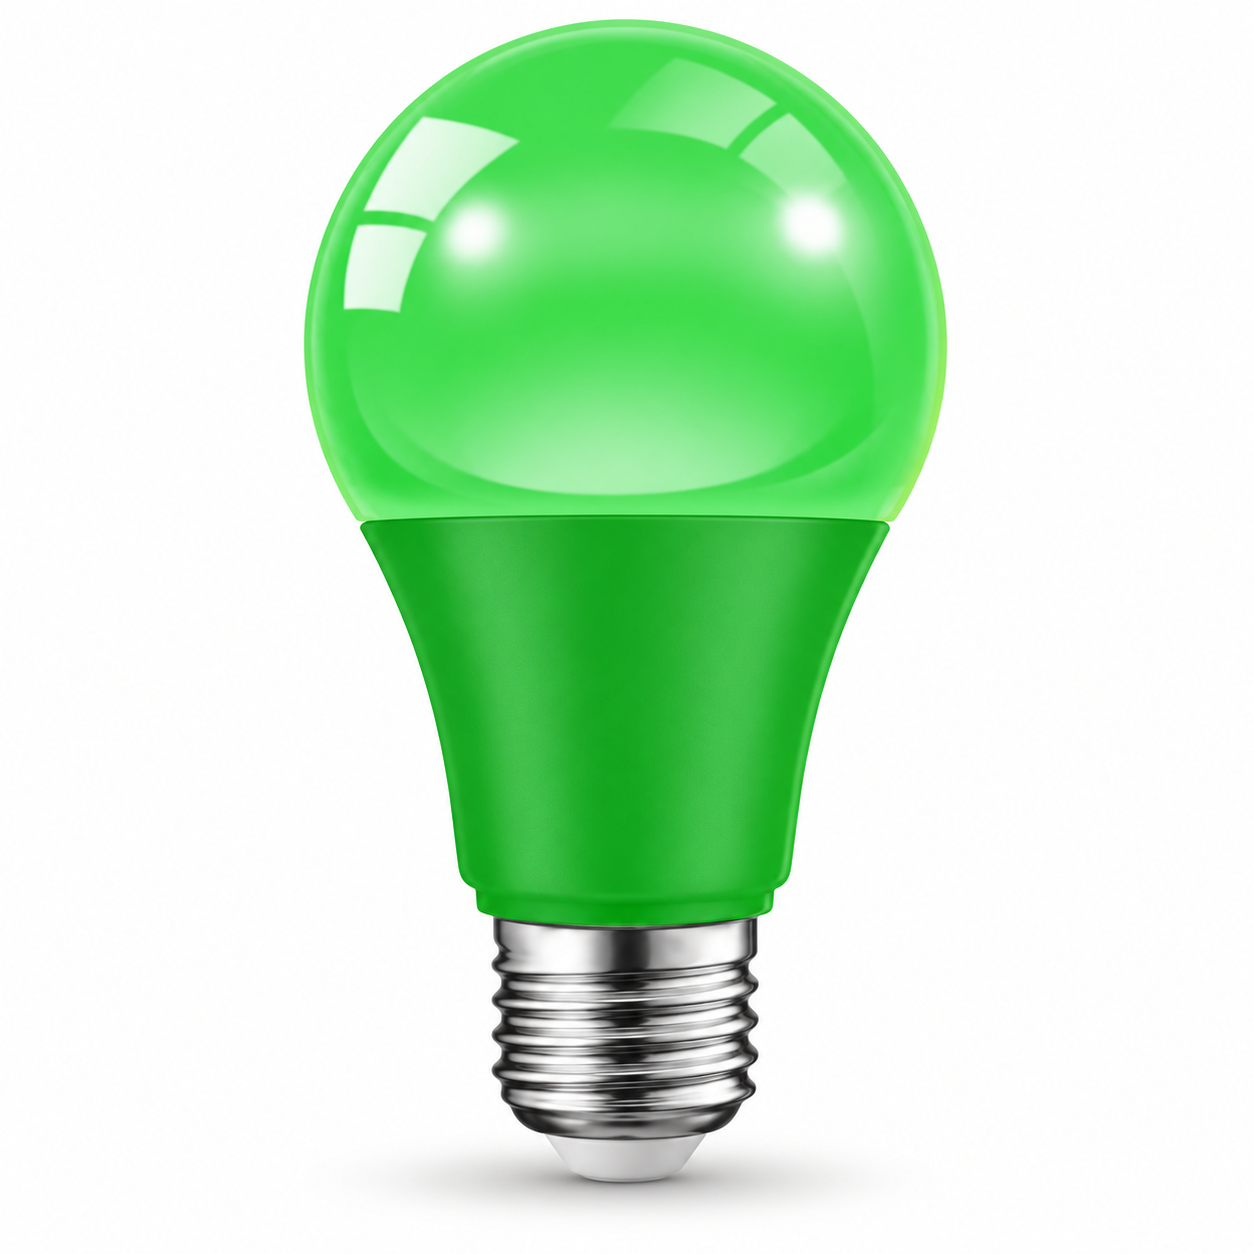
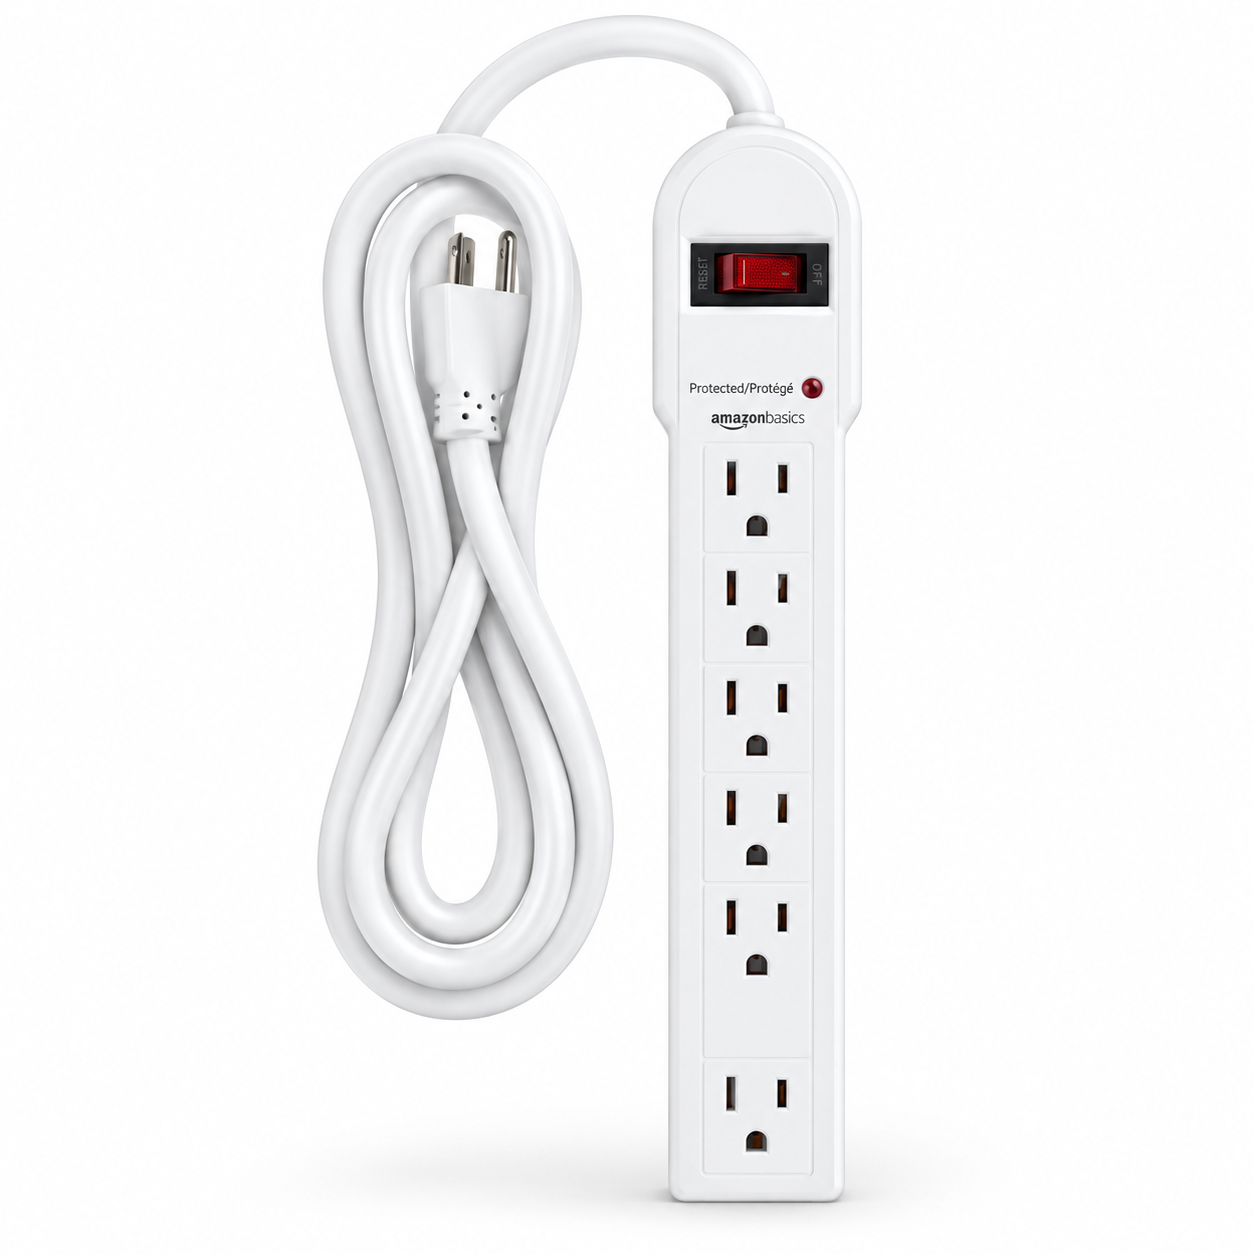
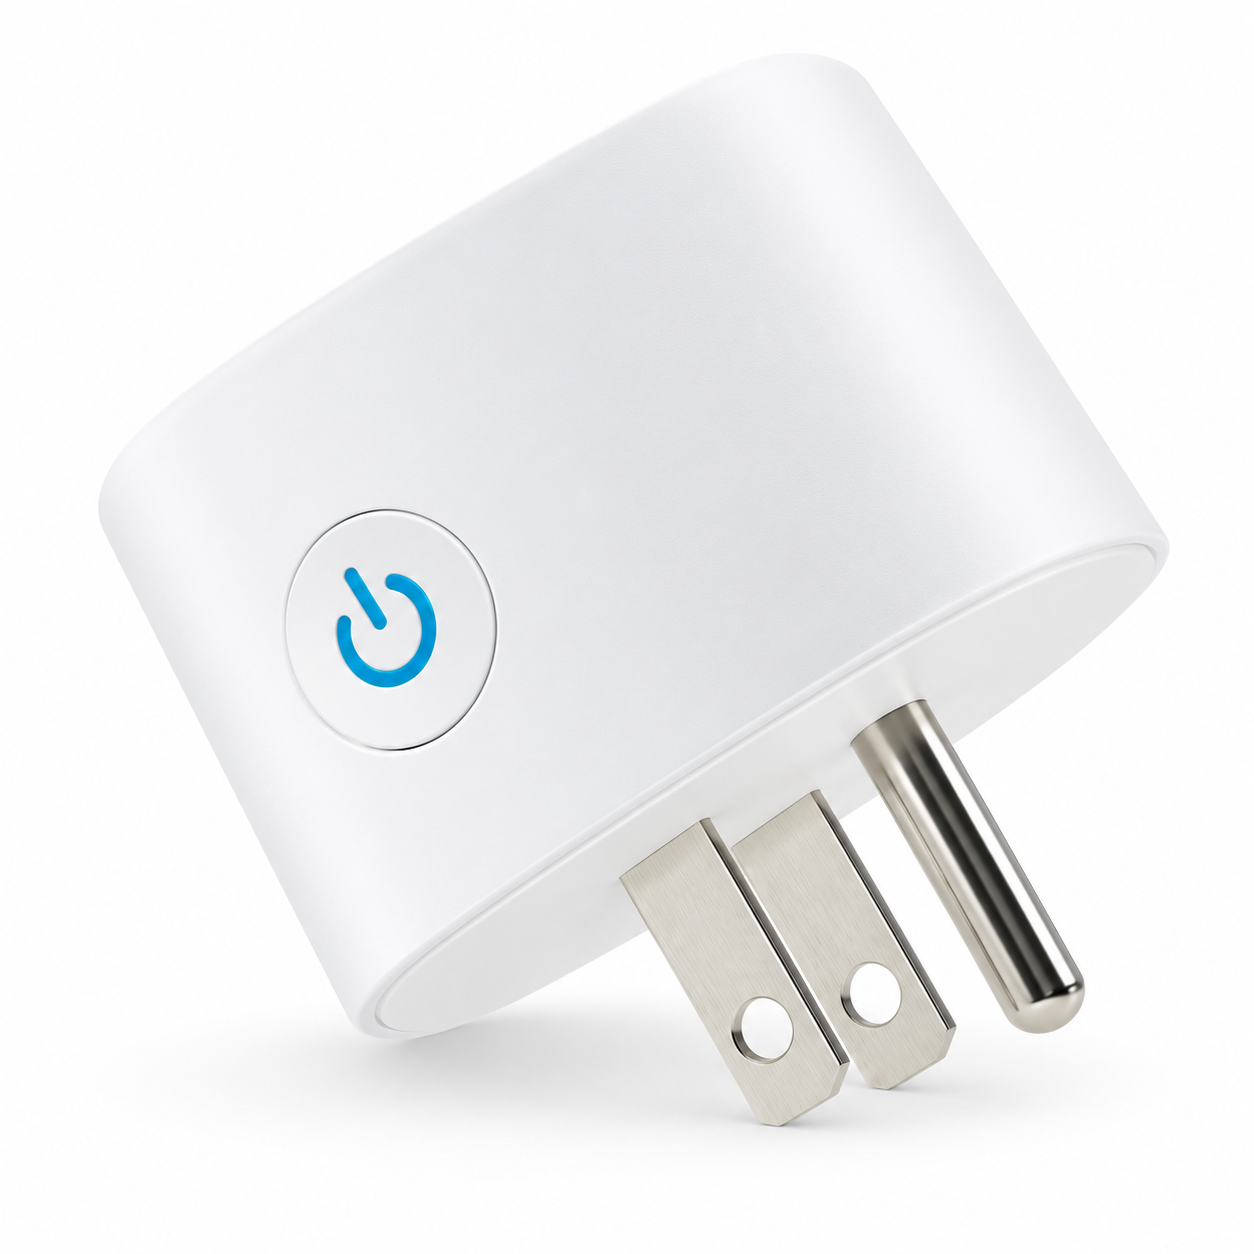
Each part has an image, quantity, and source link so anyone can reproduce the build.


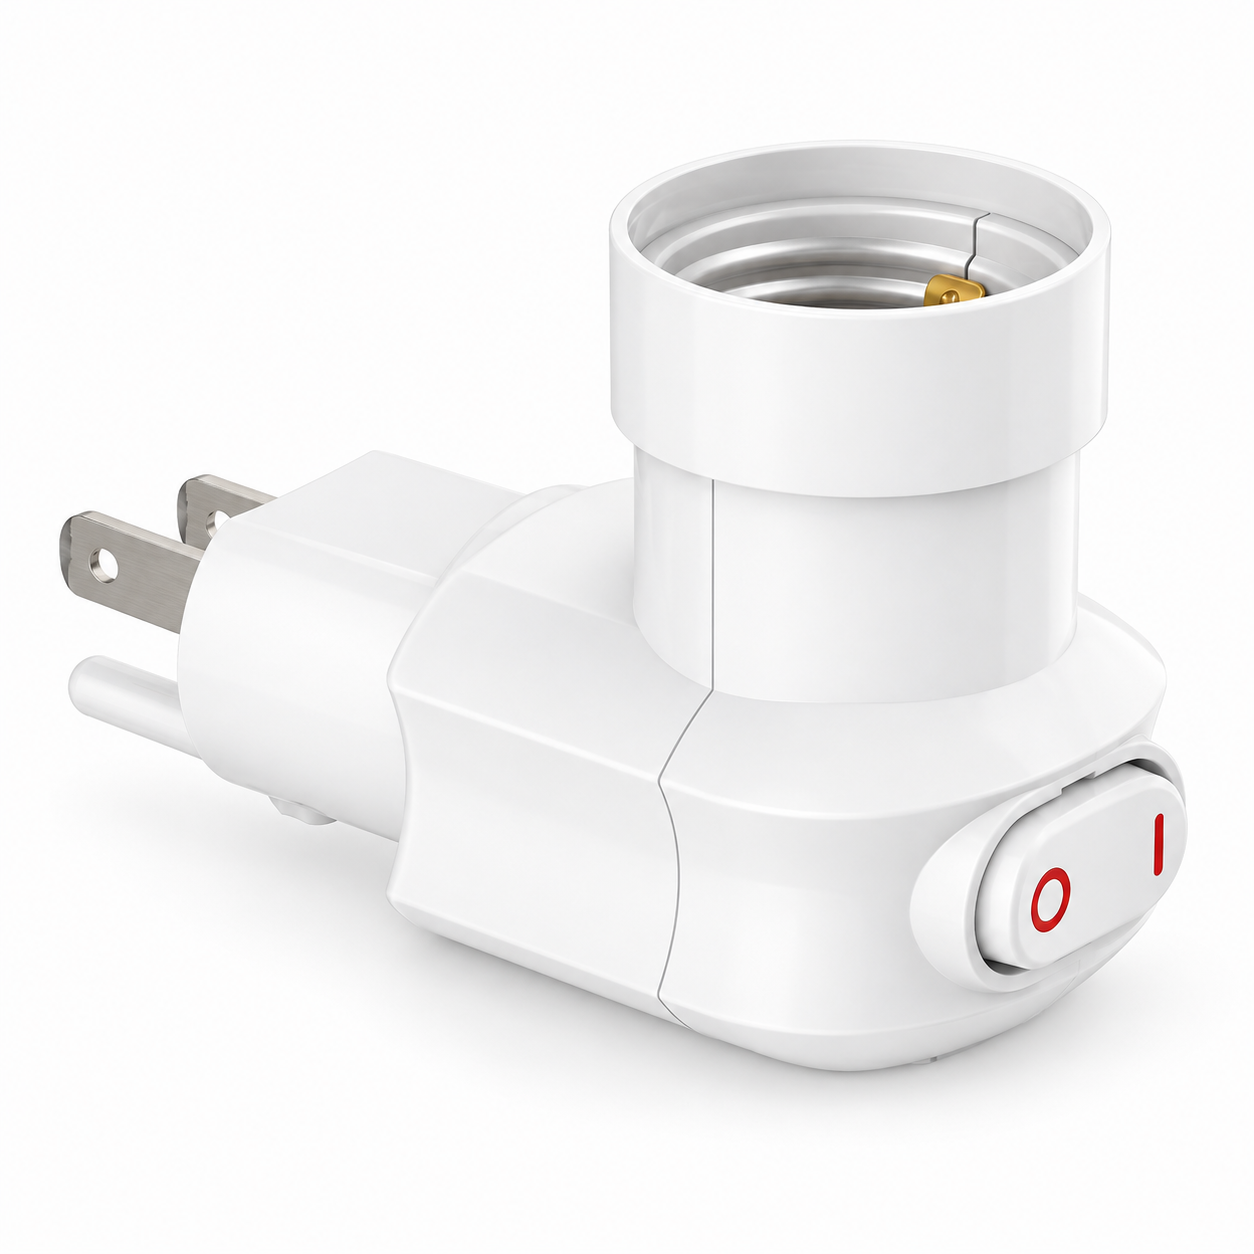
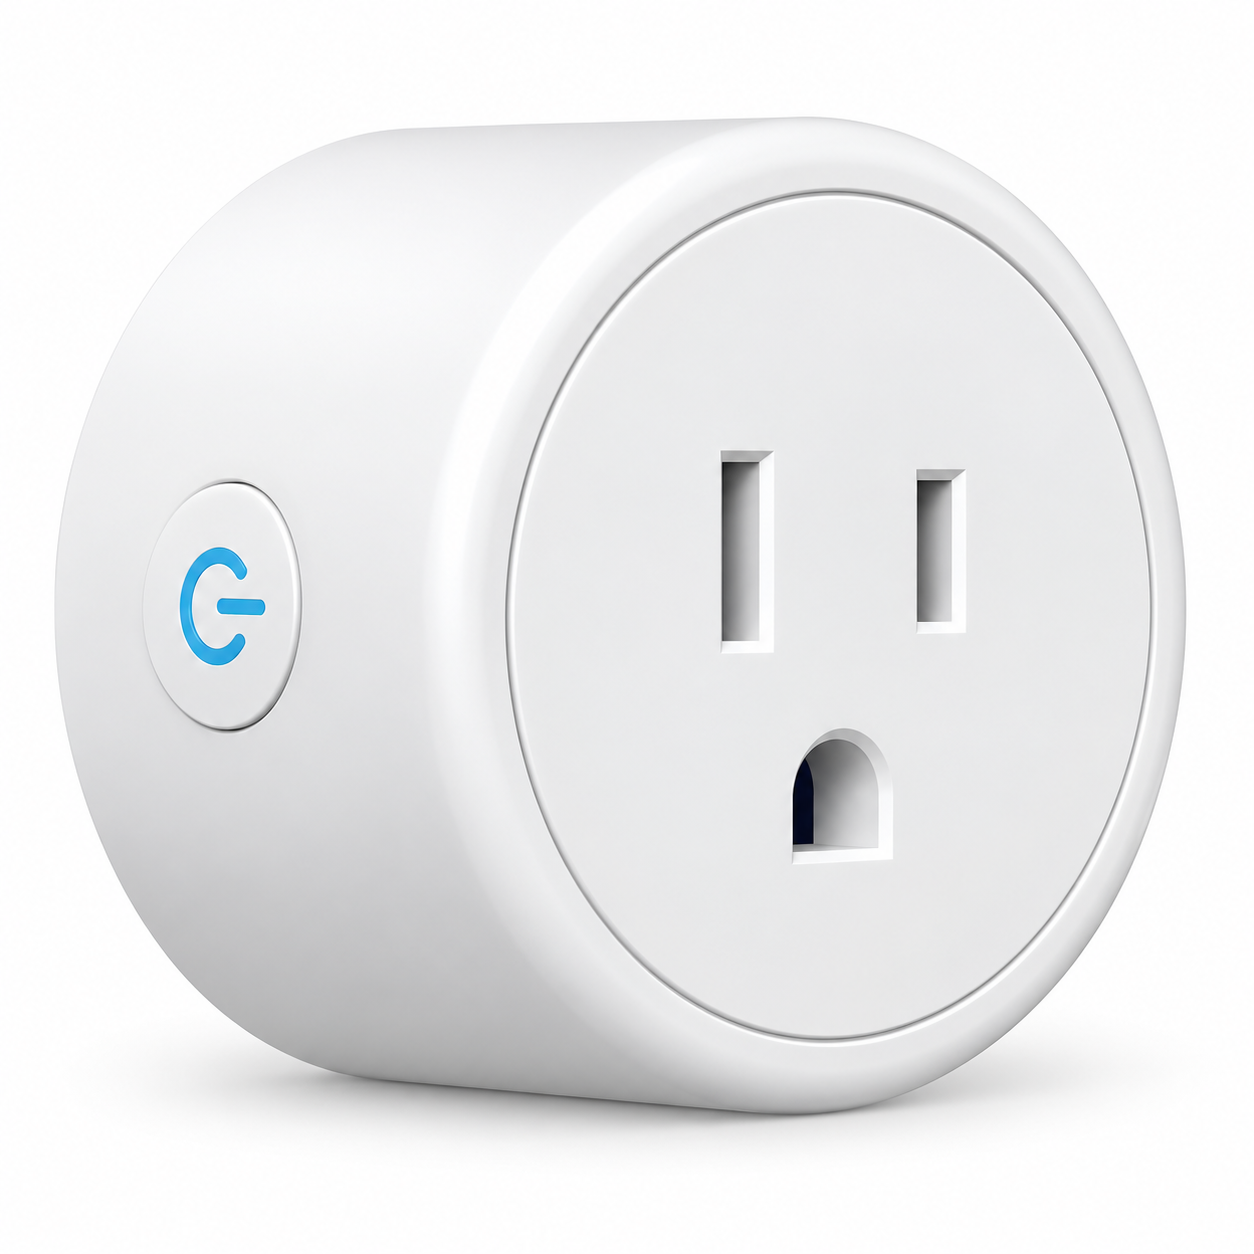
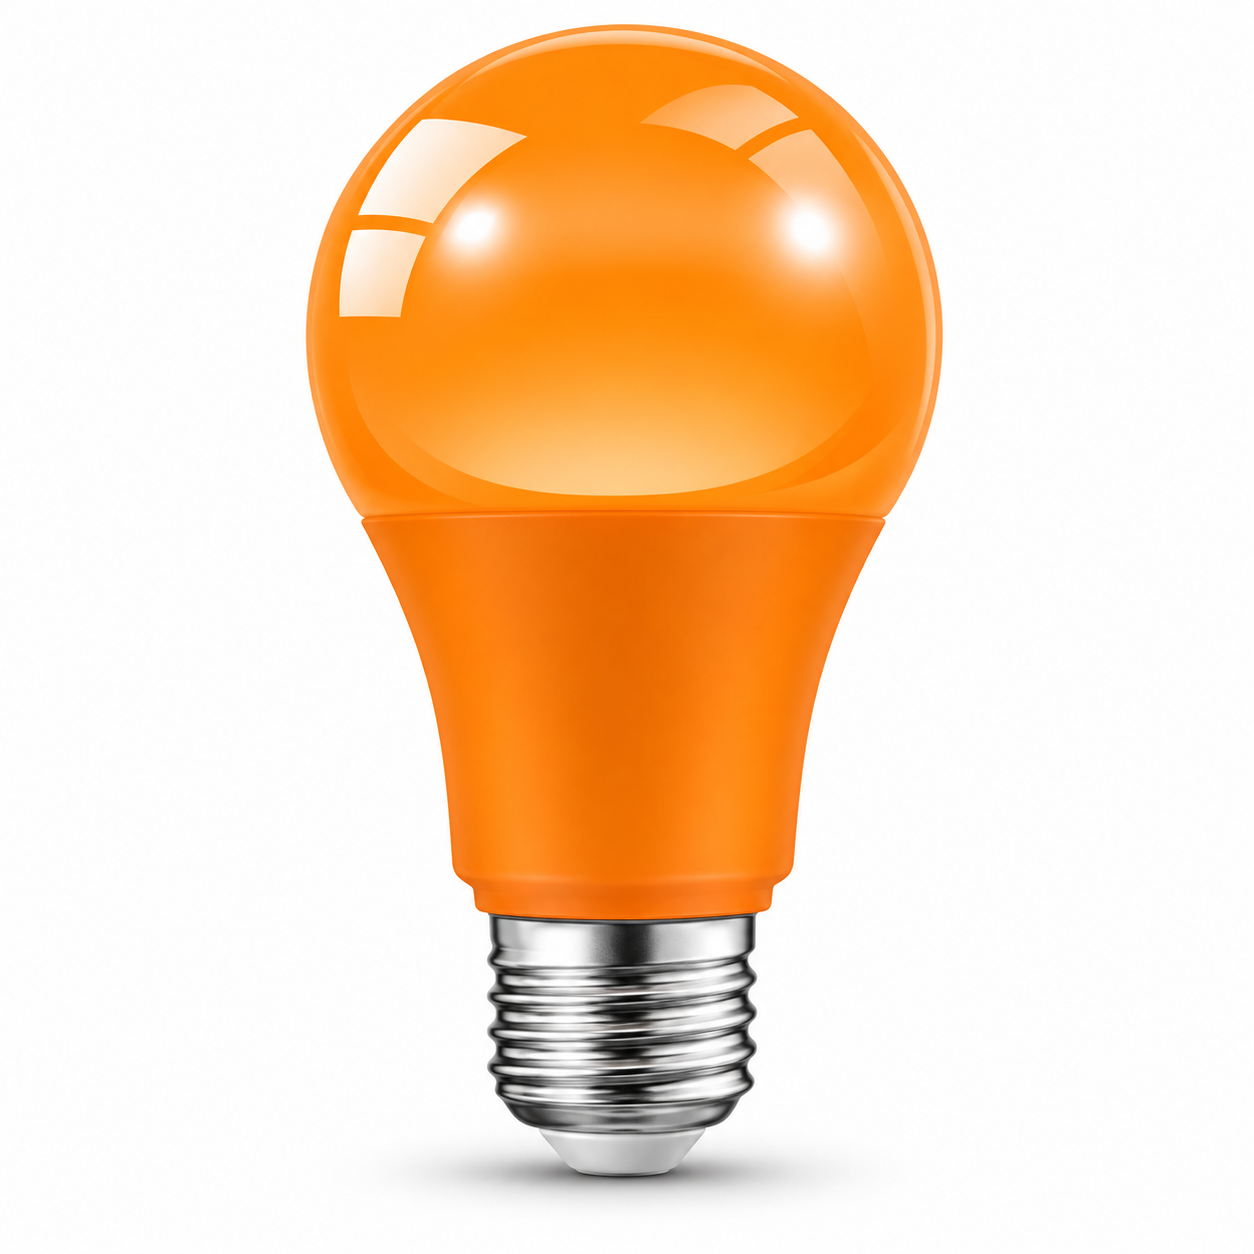
These product shots support the parts list and make the build feel more polished on the site.


This walkthrough intentionally spells out every setup step, including the phone app, Device ID, Local Key, IP address, and how to start the program.
The download includes helper tools for finding these values. No Tuya Developer account, cloud project, Access ID, or Access Secret is required.
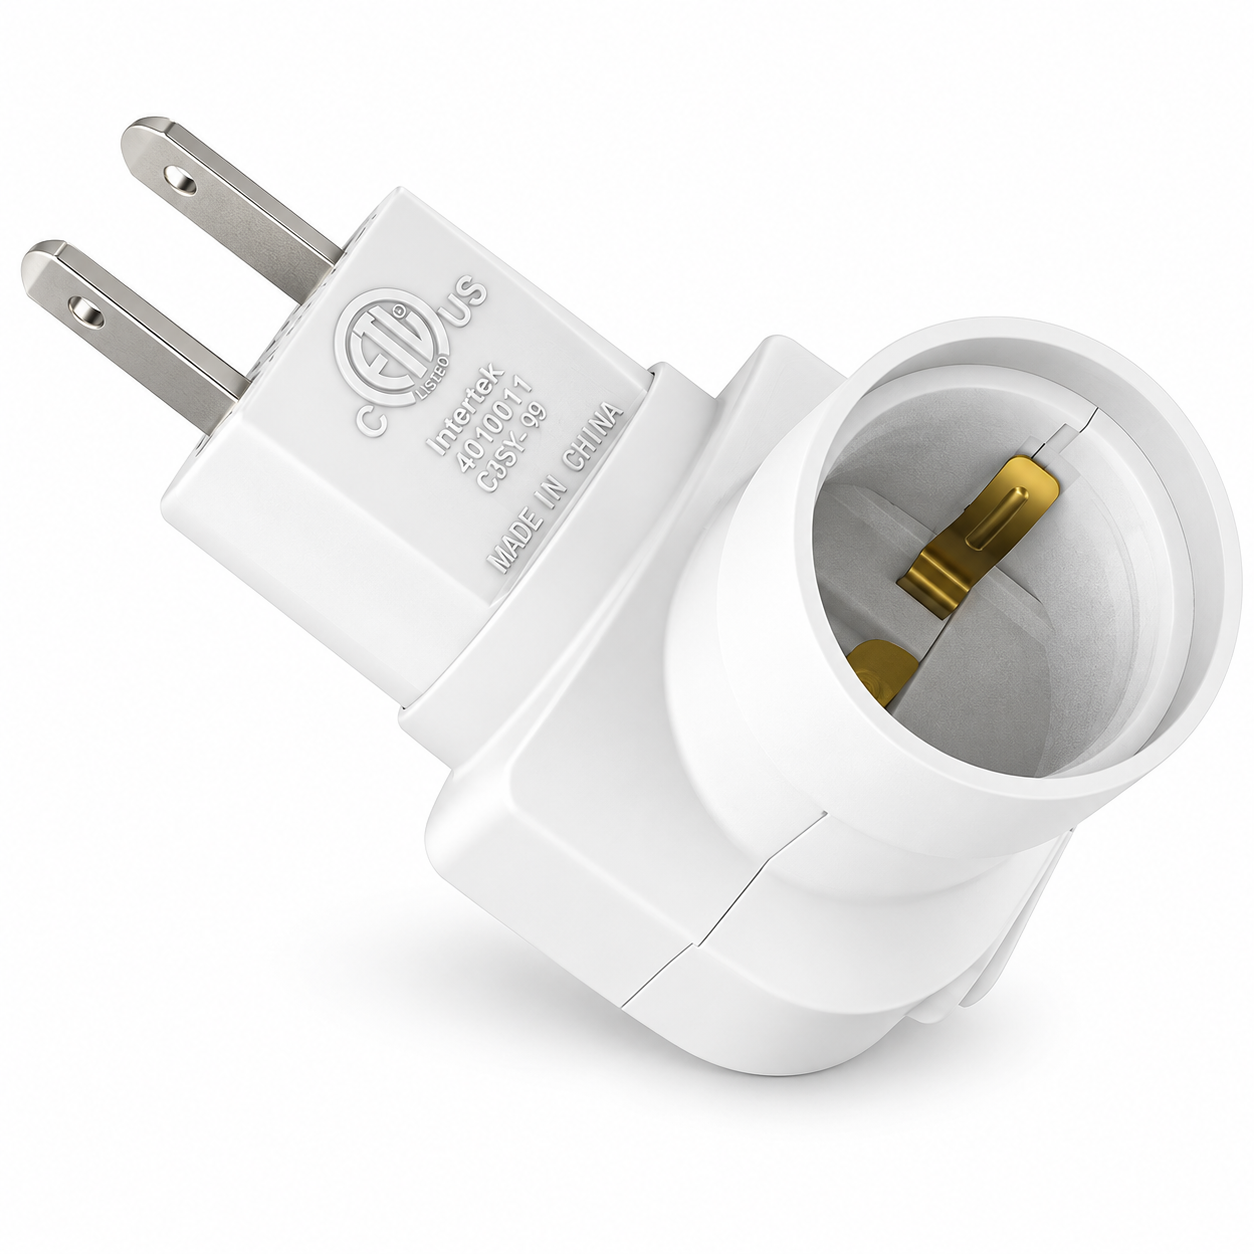
Plug each smart plug into the power strip. Plug a socket adapter into each smart plug, then install the green, amber/yellow, and red bulbs. Leave each socket adapter's physical switch turned ON.
Download Smart Life, create a normal account, and sign in. Keep all three plugs in this same account.
Pair each plug to your 2.4 GHz Wi-Fi. Name them Green Light, Amber Light, and Red Light. From Smart Life, turn each plug on and off once to confirm all three work.
Install Python from python.org. When finished, open Command Prompt and type py --version. If a Python version appears, continue.
Click Download Project, extract the ZIP into its own folder, and double-click 1-install.bat. It creates a private Python environment and installs the required tools automatically.
Make sure the PC and plugs are on the same network, then double-click 2-find-devices.bat. The LAN scanner shows each plug's Device ID, IP Address, and Version such as 3.5. If you are not sure which plug is which, unplug one plug, scan again, and note which Device ID disappeared. Plug it back in and repeat as needed.
On your phone open Smart Life → Me → Settings → Account and Security → User Code. Leave this screen open because the next tool will ask for that code.
Double-click 3-get-local-keys.bat. Enter the Smart Life User Code when asked. A QR code will appear on the PC and a backup image named tuya-login-qr.png is created. In Smart Life tap + → Scan, scan the QR code, then tap Confirm login. If Smart Life says the login is for Home Assistant, that is expected for this QR login method.
After you confirm the QR login, the tool lists the devices in your Smart Life account and creates device-info.csv. Match Green Light, Amber Light, and Red Light by name or Device ID and copy each device's Local Key. Keep these keys private.
Make a copy of config.example.json and rename the copy to config.json. For Green, Amber, and Red, enter the Device ID, IP Address, Local Key, and Version you collected in Steps 06–09.
Double-click 4-test-lights.bat. The project should turn on Green, then Amber, then Red, and finally turn everything off. If the wrong physical light turns on, correct the matching device block in config.json.
Open Microsoft Teams, then double-click 5-run.bat. Leave the command window open while the project is running. Change your Teams presence and the physical lights should follow it.
Make sure the PC and plugs are on the same local network, the plugs are online in Smart Life, and Windows Firewall is not blocking TinyTuya. Try the scan again.
Open tuya-login-qr.png from the project folder and scan that image instead. QR codes expire quickly, so rerun 3-get-local-keys.bat if the login times out.
Re-pairing a Tuya device can change its Local Key. Run 3-get-local-keys.bat again and update config.json with the new key.
Do not upload or share config.json, device-info.csv, or your Local Keys. They allow local control of the smart plugs.
A Raspberry Pi–based Mini NES that reads the unique ID already stored on an NFC tag, maps that cartridge to a ROM, and launches the game through RetroPie.
The included setup guide reflects the original build and uses Raspberry Pi 3 B+, RetroPie, Python 2.7, legacy pip packages, and libnfc 1.7.1. It is presented as the original documented project rather than a modernized 2026 install guide.
This original demo shows the physical Mini NES build launching a game through the cartridge-based NFC workflow.
The cartridges do not need to be written. The system uses the unique UID already programmed into each NFC tag and maps it to a ROM file.
A cartridge contains an NFC tag with its own unique UID.
The NFC poll daemon reads the tag through the Raspberry Pi I²C interface.
The cartridge UID is matched to a ROM path in nfc_poll.conf.
The screen manager starts the ROM; when the tag is removed, the dashboard can be restored.
[Cartridges]
d6422030 = nes/zelda.zip
# <nfc uid> = <path relative to roms_home>
These are the components documented in the original project. Source links are preserved as historical build references and may have changed since the project was published.
Original build used a CanaKit Pi 3 B+ bundle with case and 2.5A power supply.
Original source link ↗Documented as an optional upgraded power supply.
Original source link ↗NFC reader configured for I²C communication with the Raspberry Pi.
Original source link ↗Each physical cartridge uses a tag whose pre-programmed UID identifies the game.
Original source link ↗Push buttons used for the physical power and reset controls.
Original source link ↗Original parts list includes a separate latching button for the cartridge assembly.
Original source link ↗Used for wiring the controls, RUN-pin resistor, and front power LED.
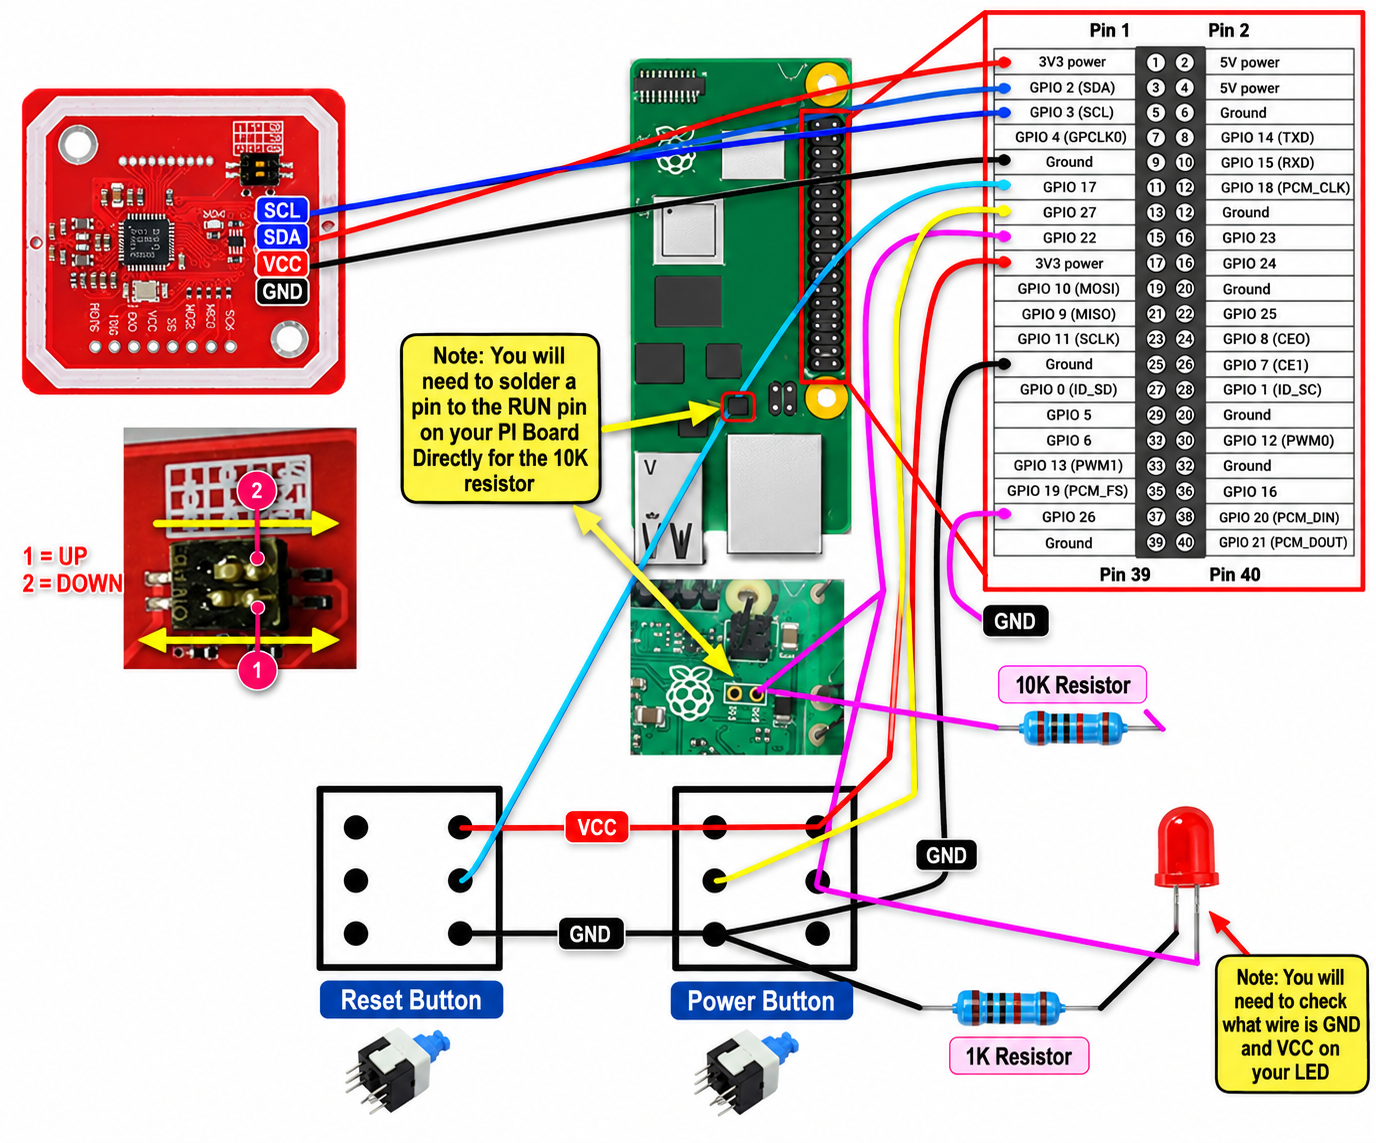
Original source link ↗The repository includes the original wiring diagram for the PN532 reader, GPIO controls, RUN pin, LED, and resistors.
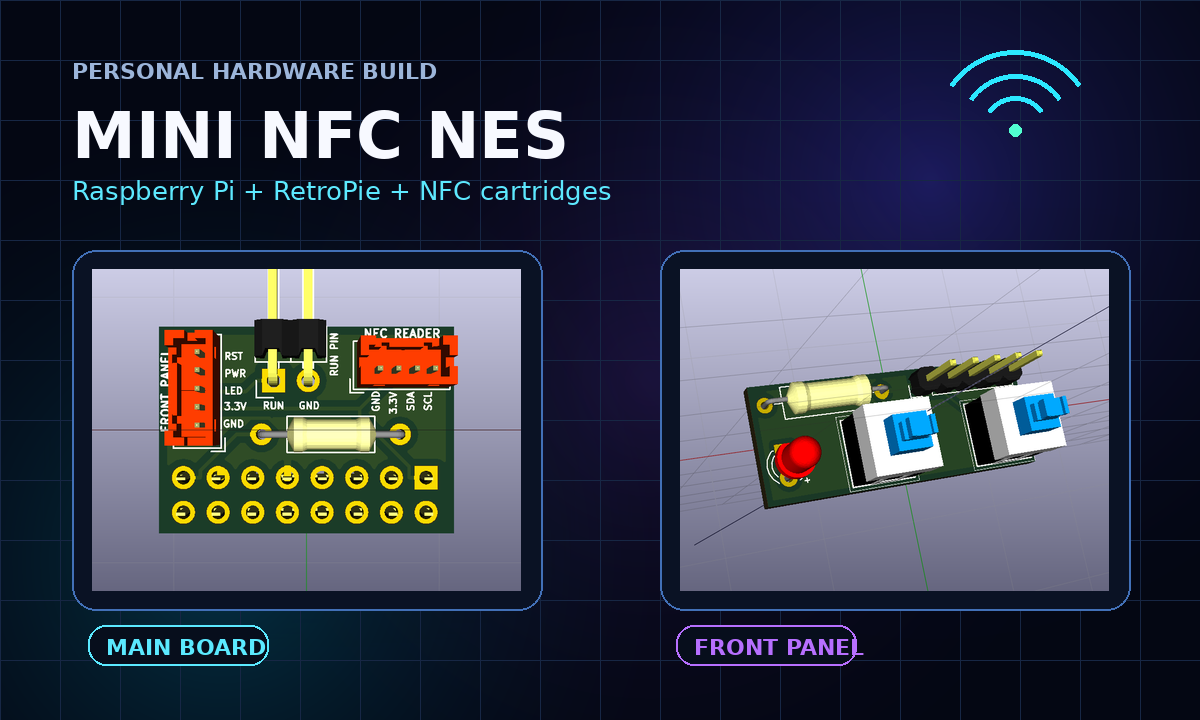
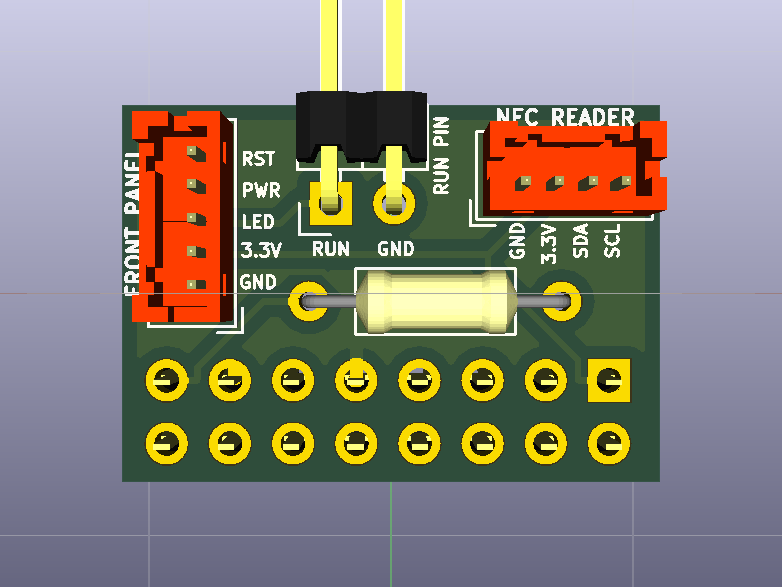
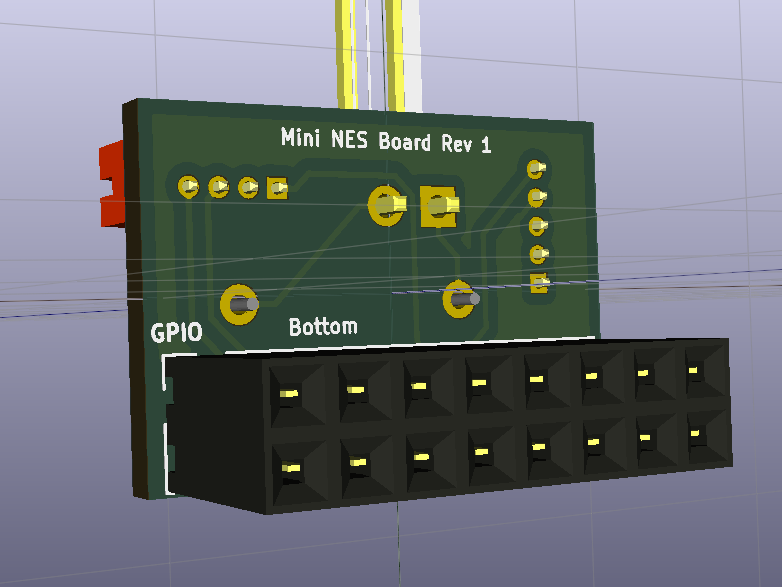
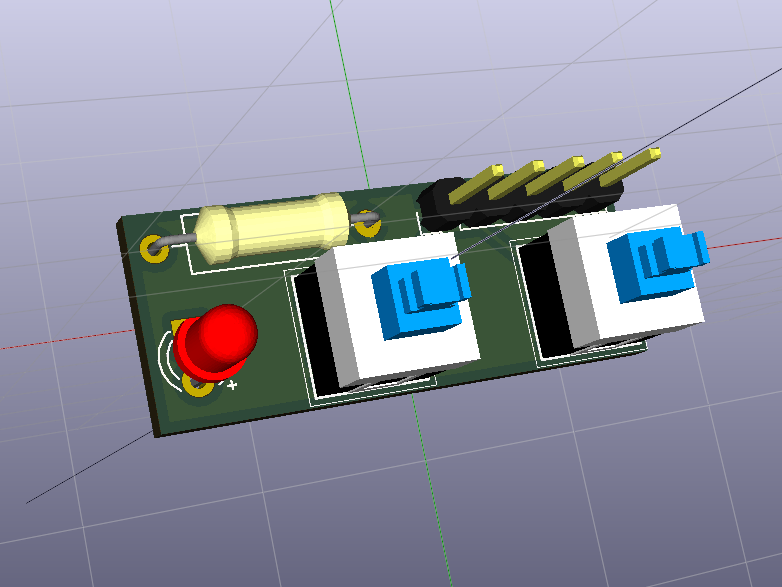
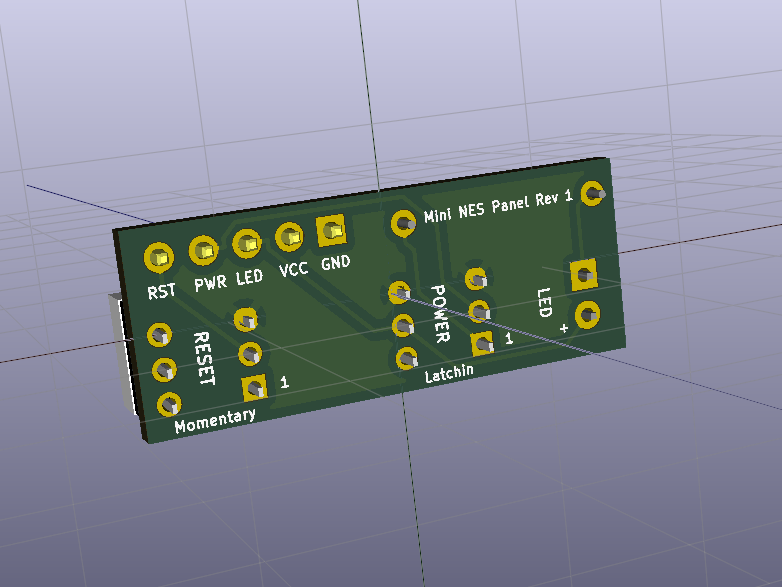
The source package includes KiCad projects for both the main board and front-panel board, plus front and back board renders.


The boards were designed around through-hole components to simplify soldering. The repository notes that the NFC and front-panel connectors use 1.25 mm pitch and require careful soldering.
This is a readable summary of the original DIRECTIONS.md. The full command-by-command source documentation is included in the project download.
Flash RetroPie, configure a controller, enable SSH, connect with PuTTY, verify Python 2.7, update the system, and install the documented Python dependencies.
Create the NFC configuration directory, enable I²C through raspi-config, reboot, and reconnect over SSH.
Download the original libnfc source, configure it for the PN532 I²C driver, compile it, install it, and verify /dev/i2c-1.
Install the NFC configuration, run nfc-poll, verify the PN532 reader opens, and confirm a tag can be read.
Clone the Mini NES source, build the NFC support code, install the daemon, and verify the nfc_poll service is active.
No data needs to be written to the NFC tags. The system maps each tag's existing UID to a game.
Watch /dev/shm/nfc_poll.log, place each tag over the reader, and record the UID reported by the daemon.
Place the appropriate ROM files in the RetroPie ROM directories. The original guide includes a Zelda download as a demonstration.
Edit /etc/nfc_poll/nfc_poll.conf and add each cartridge under [Cartridges] using <uid> = <game file>.
Add the documented service start commands to /etc/rc.local so the NFC and button services start with the system.
Install the screen manager so RetroPie can switch between EmulationStation and a ROM in response to cartridge events.
Install the physical button daemon. With the wiring in place, the original guide notes that the power LED should turn on after installation.
Restart RetroPie and place a configured NFC cartridge over the reader to test the complete workflow.
The original design uses Raspberry Pi GPIO plus the RUN pin so the case behaves more like a small console.
Brings the Pi out of reset on startup. During shutdown, GPIO keeps the RUN pin high until the operating system finishes shutting down.
A momentary GPIO input tells the nes_buttons daemon to reboot the system.
Connected to the RUN state so the light reflects the actual Pi run/reset state rather than simply showing that USB power exists.
The repository includes troubleshooting notes for all three major subsystems.
Check the nes_buttons service/log, run the script manually, and verify the RUN-pin voltage and pull-down resistor behavior.
Check the nfc_poll service/log, verify the reader's I²C DIP-switch position and wiring, and confirm the board's red LED is powered.
Inspect /dev/shm/screen_manager.log and the generated config, and verify the RetroPie autostart modification if the dashboard or ROM does not launch.
The download contains the original README, directions, troubleshooting guide, NFC daemon, button daemon, screen manager, wiring diagram, and KiCad board projects.
Download the complete source package used to build this project page, including code, documentation, wiring references, and PCB design files.
Ember is a tiny Windows desktop dragon built with Python and PySide6. She lives directly on the desktop, wanders around, reacts to attention, develops moods and a bond, plays with toys, tells jokes, performs tricks, and occasionally causes a little harmless dragon chaos.
The final build keeps the walking, personality, sounds, daily life, cursor interaction, accessories, and unlock systems while adding a new desktop-play layer.
The project keeps a persistent pet state and gives Ember enough small behaviors to feel like she actually lives on the desktop.
Ember moves around the desktop on her own, can be dragged to a new spot, and can pause when you need less activity.
Core pet actions affect happiness, fullness, energy, bond, XP, mood, and the daily-life behavior system.
Interactions build XP and bond over time, while Dragon Home tracks Ember's level and persistent statistics.
Happy, playful, sleepy, hungry, bored, excited, curious, and content moods influence chatter and idle behavior.
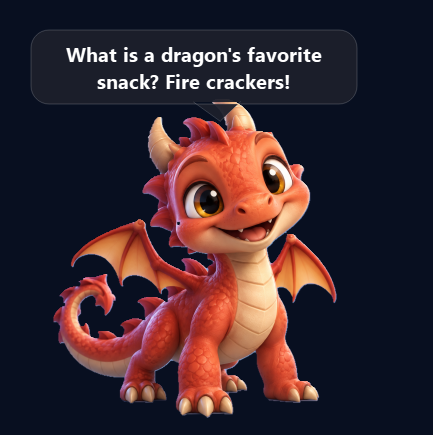
Ember can tell random dragon jokes, perform tricks, breathe fire, and surprise you with personality events.
She notices the pointer, can seek attention, and can harmlessly pounce near the mouse without taking control of it.
Unlock scarves, glasses, and a tiny crown, then play with favorite toys such as a ball, gem, or rubber duck.
Settings, progress, counters, moods, bond, accessories, and other pet data survive restarts in Local AppData.
The final version added interactive desktop toys and small mischief events rather than keeping Ember as a passive screen character.
Throw a real moving ball across the desktop and Ember will chase it.
Spawn a shiny treasure somewhere on the current screen and Ember will go collect it.
Dragon Home keeps track of how many treasures Ember has collected and how many successful ball chases she has completed.
Random mischief can send Ember toward the edge of the screen to partially hide and peek back at you.
Ember can pounce near the pointer as a harmless attention-seeking behavior.
Toys and mischief can be disabled automatically with Calm or Do Not Disturb behavior modes.
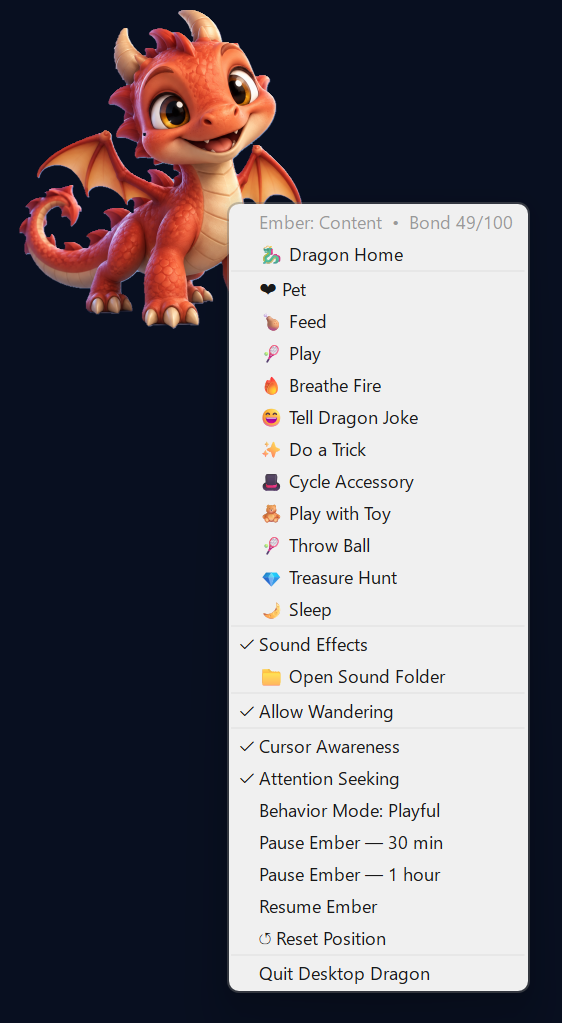
These real in-app previews show Ember walking around the desktop, telling jokes, and exposing a full set of fun actions through Dragon Home.
Desktop Dragon is designed to feel alive, playful, and surprisingly interactive instead of acting like a static desktop mascot.
Ember moves around the desktop, explores the screen, and can be left to roam or paused when you want less activity.
Ask Ember to tell a joke and she pops up with a goofy dragon one-liner to keep the desktop fun.
Trigger a playful fire-breathing action right from Dragon Home for one of the most fun visual moments in the pet.
Play with toys, throw a ball, and launch treasure hunts so Ember can chase, collect, and interact with the desktop.
Ember can perform tricks, react with moods, seek attention, and feel more like a real little desktop companion.
Pet, feed, sleep, cycle accessories, manage sound effects, toggle cursor awareness, and explore even more controls inside Dragon Home.
The v0.8 package is intentionally simple to launch on Windows.
Download the project ZIP and extract it to a normal folder on your Windows PC.
Double-click run_dragon.bat. The launcher installs/uses the required Python environment and starts the desktop pet.
Double-click Ember on the desktop to open Dragon Home and see stats, actions, personality controls, sounds, toys, and settings.
Use Throw Ball, Treasure Hunt, feed Ember, ask for a joke, perform a trick, or just let her wander.
The build keeps user data outside the application folder so upgrades do not wipe Ember's state.
Pet state, progression, settings, counters, and crash logs live here.
Drop in optional WAV files for actions such as feeding, fire, tricks, sleeping, chatter, wings, and more.
The tray menu exposes quick actions, behavior modes, Toys & Mischief, and Start with Windows.
If the normal launcher exits unexpectedly, the debug launcher keeps the error visible and a crash log is written to Local AppData.
The downloadable v0.8 package includes the Python/PySide6 application, walk-cycle assets, launcher, debug launcher, icon assets, requirements file, and README.
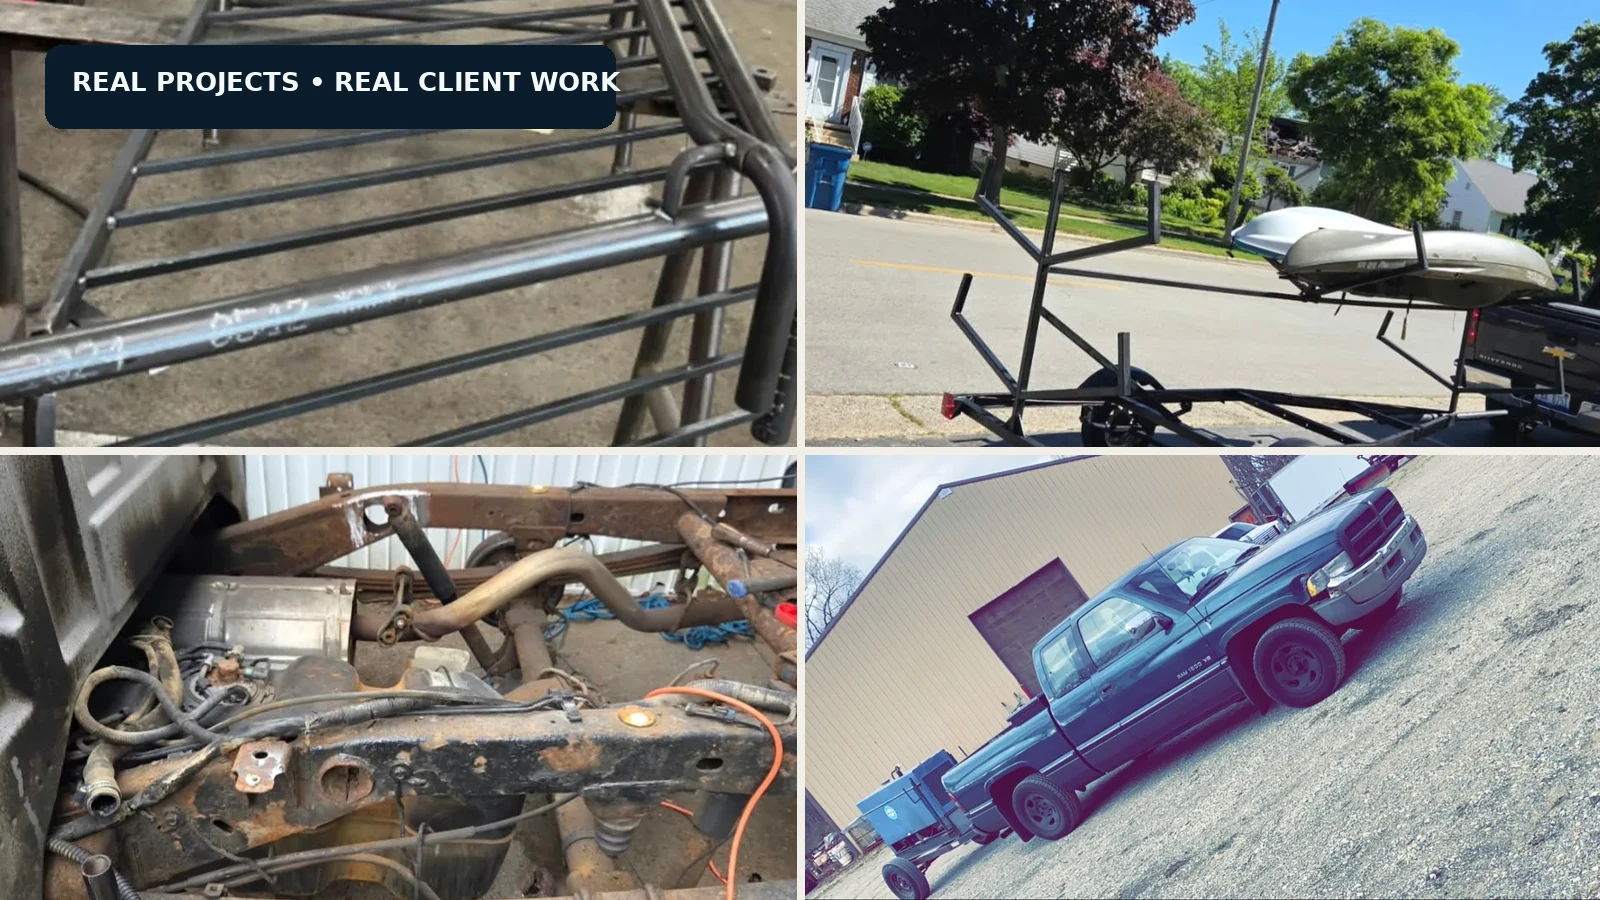
A clean-sheet website redesign for JV Metal Works, built around the work the client actually wants to attract: repairs, custom fabrication, mobile welding, trailer work, handrails, and one-off metal projects.
The original site communicated the basics, but it did not visually match the quality or range of the work. Project Weld rebuilt the experience around credibility, real client photography, strong industrial design, and a much clearer path to requesting work.
The content hierarchy was rewritten around the client's main focus: repairs and custom fabrication, with one-off manufacturing positioned as an additional capability.
Mild/carbon steel, stainless, aluminum, and MIG / TIG / stick are presented clearly so visitors immediately understand the range of work JV can take on.
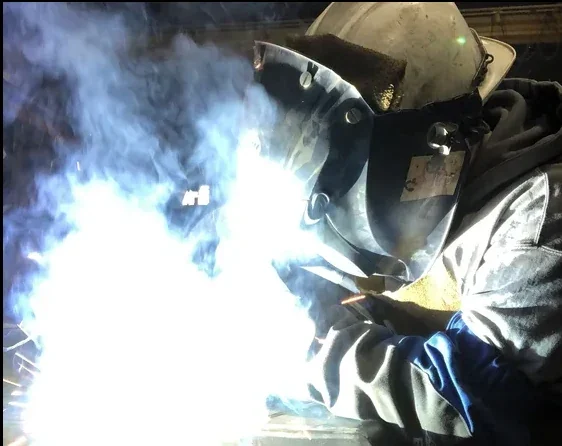
Real welding, trailer, handrail, frame-repair, and service-truck photography replaces the generic small-business-template feel.
Responsive navigation, mobile call actions, project galleries, quote-focused calls to action, and a clear contact flow keep the site useful as well as polished.
Warm off-white surfaces, deep steel blue, charcoal typography, and restrained copper accents create a cleaner premium look while still feeling unmistakably tied to welding and metal fabrication.
The downloadable package is the client-site build supplied for Project Weld, including the responsive HTML, CSS, JavaScript, and bundled project imagery.